How to use 2.35:1 Cinematic Crop

Our team here at Rhino wanted to share with you a quick tip to make your video look a little more cinematic. As many of you probably already know, to achieve a more cinematic look on your video, you can add a crop or "black bars" above and below your clip. But what is the exact crop size, aspect ratio, or process to adding these black bars to your video? In this video talk about how to properly add bars to your footage with the 2.35:1 crop.
STEP 1
Do not forget to frame your shot with the crop in mind when shooting the video!
The crop lines will be cutting a lot of your frame if you are shooting in 16x9. So you will want to frame your shot a bit farther back or with a wider lens due to the added 2.35:1 crop.

STEP 2
Download the provided 2.35:1 PNG files and save it to your desktop. The first image is for a 16x9 (1920x1080) clip. The second image is for a clip that was shot in 4K (3840x2160).

16x9 (1920x1080)

4K (3840x2160)
STEP 3
Import the PNG image into your project and lay it over the clip you would like to crop. You may have to scale up the image to 200 if you have the 16x9 PNG.

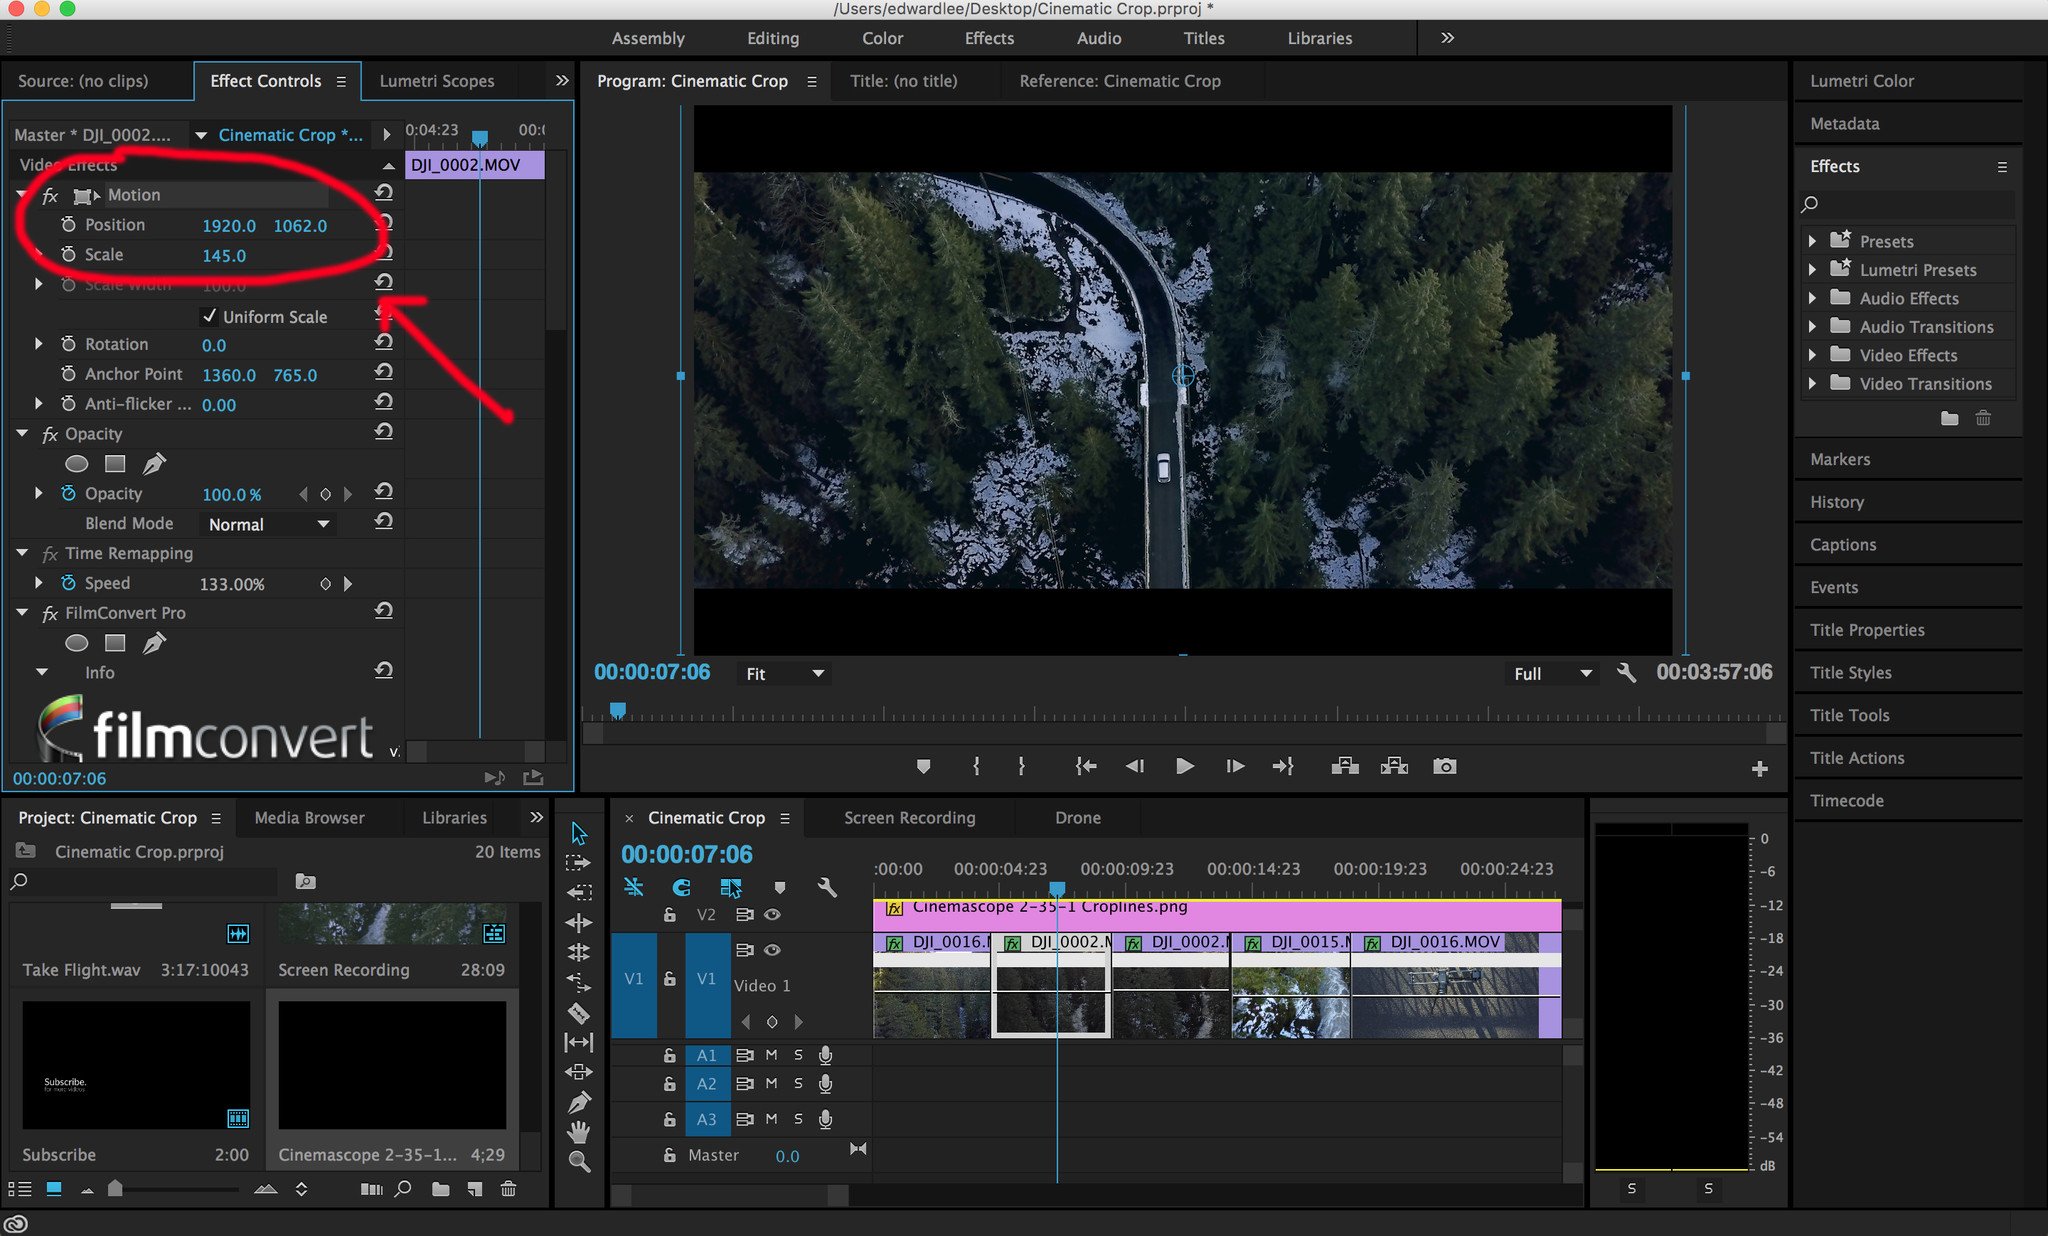
STEP 4
Adjust the clip within the crop to your liking using the 'Motion' effect. You may need to position it further up or down to fit the black bars.
STEP 5
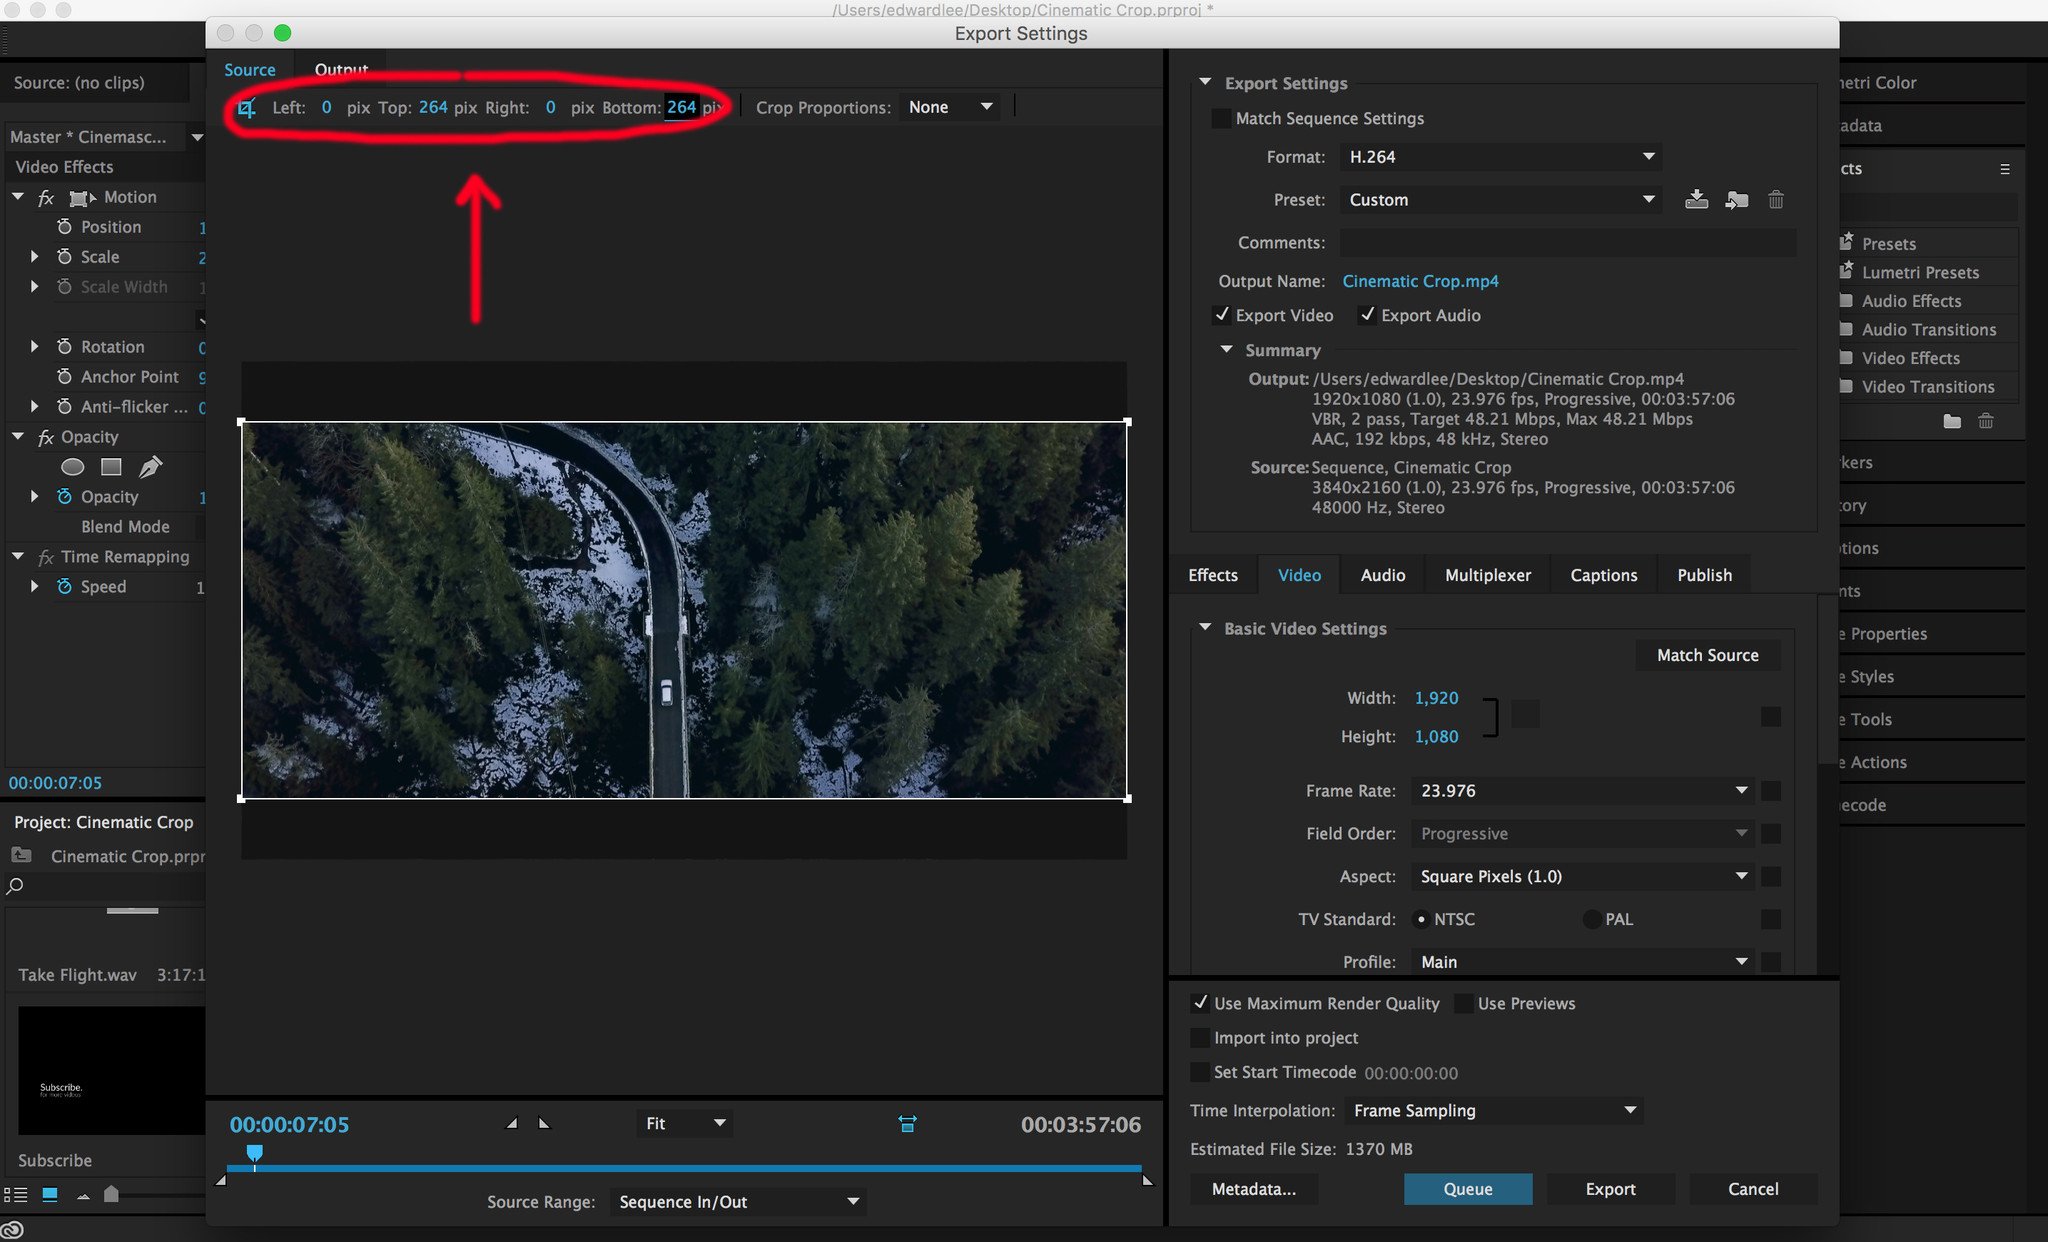
Export the clip with the proper export settings. Be sure to keep these points in mind.
- Pixel count for the crop (top & bottom): 132 for 1080p HD. 264 for 4K
- YouTube automatically adds their own "black bars" when posting without bars
- Vimeo does not add their own crop/bars when uploading
CONCLUSION
Thanks for watching our video and reading our article on how to properly crop your video for a cinematic film look. There are several ways to achieve this look while editing, but we have found this way to be the most efficient for our workflow.

